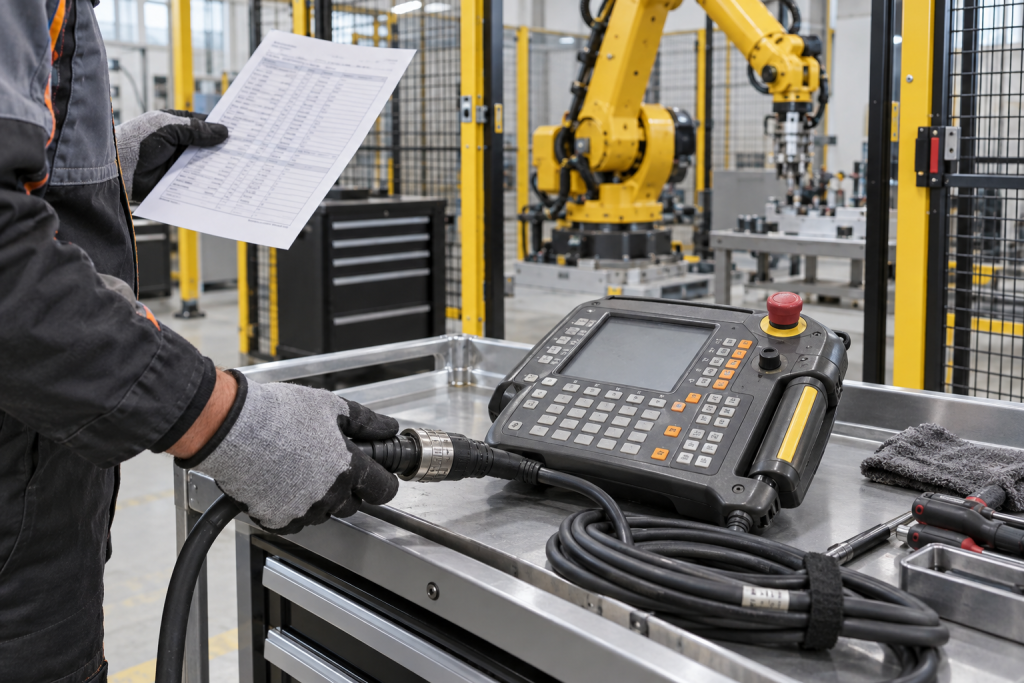
A robot that will not jog is often blamed on the teach pendant because it is the most visible part of the operator interface. That can be right, but the symptom can also come from the cable, controller-side connector, selected operating mode, enabling device, emergency-stop circuit, safety chain or controller configuration. A pendant replacement that does not match the installed controller generation can leave the cell unavailable or create an unsafe attempt to restore motion. Begin with the complete KUKA controller and KCP identification, then separate the operator-interface symptom from the robot and safety-system state.
Record the installed system, not just the pendant face
Photograph the full pendant nameplate, connector, cable entry, controller cabinet model, software generation and any intervening coupler. Record whether the screen is blank, keys are intermittent, a specific mode is unavailable, the emergency-stop chain is open, or the pendant is recognized but motion is inhibited. Note when the fault occurs: during startup, after cable movement, at a particular connector position, or only in manual operation. Save controller messages and the approved configuration backup before changing settings. The KUKA KR C2 system documentation treats the teach pendant as one component of a controller assembly that also includes safety logic and connections.
Trace the simple boundaries first
With the robot in the site’s safe state, inspect the pendant cable for crushed sections, tight bends, abrasion, oil ingress, strain-relief damage and connector locking problems. Look for bent or recessed contacts without probing energized pins. Check the controller-side plug and any coupler for seating, contamination and mechanical damage. If the fault follows gentle cable movement during an approved static check, document the location and stop flexing it; repeated movement can worsen a broken conductor. A blank screen with no controller recognition suggests a different boundary than a pendant that displays normally but reports an open safety circuit.
Do not treat safety controls as ordinary buttons
Emergency-stop, enabling and mode-selection functions are part of the robot’s safety behavior. Never bridge contacts, defeat an enabling switch, bypass an E-stop or substitute a convenient cable to test whether the robot moves. A damaged enabling device or unexpected safety message requires the site procedure and competent safety personnel. Verify the external safety circuit, gate interlocks, mode selector and controller diagnostics independently of the pendant display. A healthy screen does not prove the safety chain is healthy; an alarm on the screen does not prove the pendant itself is defective.
Match the spare to the exact controller execution
DriveKNMS lists a KUKA KCP2 teach pendant module and a separate KCP2 VKCP2 control-panel reference. These are catalog references, not statements that the two are interchangeable. Compare the full item number, controller generation, connector keying, cable execution, safety interface, mode selector, software version and installed configuration. The KR C2 family has different editions and project-specific options; do not order by screen shape or the broad KCP2 label alone.
Keep controller and pendant evidence together
Before a replacement, capture the controller’s software and hardware identifiers, pendant code, cable length and connector photographs, the error log and the original project backup. Ask the supplier to confirm the exact part identity and state whether the item is new, repaired or previously installed. Ask what inspection was performed on keys, display, cable and safety-related controls; do not accept a generic “tested” statement as a substitute for item-specific evidence. The application owner remains responsible for confirming the pendant can be used with the installed KUKA controller and safety architecture.
Commission under controlled conditions
Use the approved KUKA and site procedure to install, configure and test the pendant. Verify the controller recognizes it, the correct mode and operator controls are available, the emergency-stop and enabling functions pass the required safety checks, and alarms clear for the right reason. Perform the prescribed safety validation before returning the cell to production. Confirm program files and tool data remain unchanged, check the cell’s external interlocks and record the as-left part number and cable routing. If the original symptom remains, return to the captured evidence rather than replacing a second component by guesswork.
Make the work order useful for the next shift
Record the pendant code and controller edition together, along with the exact alarm, time, operating mode, display state and whether the controller recognized the unit. Note cable condition and any recent routing or cabinet work. If a known-good pendant is used as a controlled comparison under the approved procedure, record its full identity and the result without treating the comparison as permission to bypass safety checks. This history helps reliability teams tell a recurring cable-life issue from an isolated operator-interface fault. It also gives procurement a specific basis for holding the right execution as a critical spare instead of ordering a generic KCP2 label that may not suit the cell.
Questions robot maintenance teams ask
Does a KCP2 label guarantee compatibility with every KR C2 cabinet?
No. Confirm the exact controller edition, connector, cable execution, safety interface and project configuration before approving a replacement.
Can I bypass the enabling switch to diagnose a no-jog fault?
No. The enabling device is safety-related. Follow the approved diagnostic procedure and never defeat it to restore motion.
What does an intermittent display or key response usually require me to inspect?
Record controller messages, then inspect the cable, strain relief, connector and pendant condition in the safe state. Do not assume the controller is at fault or flex a damaged cable repeatedly.
What details should accompany a KUKA pendant RFQ?
Provide the full pendant code, KR C2 edition, controller and software identifiers, connector and cable photos, safety-interface details, fault evidence and required condition.
For a KUKA pendant inquiry, send DriveKNMS the full item label, controller generation, connector and cable photos, safety-chain symptoms and required delivery window. We can help check the exact catalog identity before your engineering team approves a replacement.
© 2026 DriveKNMS. All rights reserved. Official Website: https://driveknms.com Inquiry: sale@driveknms.com | WhatsApp/Tel: +86 18359293191